
Table of Contents
- Why Graphic Tees Stain Differently Than Plain Shirts
- Pre-Treatment: The Step Most People Skip
- How to Wash Graphic Tees Without Fading the Print
- The Best Stain Remover for Screen Printed Shirts
- How to Remove Oil Stains From Cotton Graphic Tees
- Emergency vs. Deep-Set Stains: Two Different Protocols
- Drying and Heat Exposure: What Ruins Prints After the Stain Is Gone
- Conclusion
- Frequently Asked Questions
Last Updated: September 24, 2026
Why Graphic Tees Stain Differently Than Plain Shirts
A graphic tee is not just a plain shirt with a picture on it, the printed layer changes how stains behave, so stain removal starts with the print, not the fabric.
Three things make graphic tees different:
- The print sits on top of the fabric, so stains can trap against it
- Some inks react badly to bleach and hot water
- Agitation wears down both the ink and the fibers
Pre-Treatment: The Step Most People Skip
Pre-treatment is the most important step in stain removal, and the one most people rush. Acting within minutes beats any product you can buy.
A few rules that save shirts:
- Never use hot water on a fresh stain, since heat sets it
- Keep bleach away from anything with a printed graphic
- Work from the back of the fabric when you can
Spot Testing Before You Commit
Spot testing is a quick check on a hidden area before you apply any cleaner to the visible stain. It takes two minutes and prevents ruined prints.
How to Wash Graphic Tees Without Fading the Print
Washing graphic tees the right way keeps both fabric and print intact, the method matters more than the detergent brand.
What to avoid every wash:
- Hot water, which fades ink and can shrink cotton
- Chlorine bleach, which strips color from prints
- High heat in the dryer, which cracks the graphic
Water Temperature and Cycle Settings That Protect Fabric Integrity
Cold water is best for graphic tees, and a gentle cycle protects fabric integrity. Hot water speeds fading and can set certain stains before they lift.
The Best Stain Remover for Screen Printed Shirts
The best stain remover for a screen printed shirt depends on two things most guides ignore: the chemistry of the stain and of the print itself. A cleaner safe on plastisol screen print can haze a DTF film or lift a vinyl heat transfer, so match the product to the print first.
How Print Type Changes Your Cleaner Choice
- Plastisol screen print (the thick, rubbery ink most graphic tees use) is cured PVC. It resists water and mild detergent well, but petroleum-based solvents, acetone, and dry-cleaning fluid can swell or dull the ink. Stick to water-based cleaners.
- Water-based screen print sits thinner and softer in the fabric. It is more breathable but more porous, so oily stains wick into the ink film. Blot fast and avoid scrubbing, which abrades the ink.
- DTF (direct-to-film) is a printed film heat-pressed onto the shirt. The adhesive layer that bonds it can soften with heat and some solvents, so keep cleaners cool and never iron over it.
- Vinyl heat transfer is a cut plastic film. Its weak point is the edge, where lifting starts. Alcohol-based cleaners and aggressive rubbing can creep under the edge and peel it, so use a pH-neutral detergent and pat, do not scrub.
If you do not know the print type, treat the shirt as the most delicate option: cold water, mild detergent, no solvents.
Matching Cleaner to Stain Chemistry
- Protein stains (sweat, blood, food, grass): use an enzymatic cleaner. Enzymes break the protein bonds that detergent alone leaves behind. Cool water only, since heat denatures protein and locks it in.
- Grease and oil: clear dish soap, applied undiluted, works because its surfactants surround oil molecules so water can rinse them away. Warm water helps, but keep it at the warmest setting the care label allows.
- Tannin stains (coffee, tea, wine, juice): an oxygen-based (percarbonate) cleaner dissolved in cool water. Oxygen bleaches color without chlorine, so it is far safer near prints than chlorine bleach.
- Ink and dye transfer: isopropyl alcohol on a cotton swab, applied only to the stain and never to the print. Test on a hidden hem first.
- Deodorant and antiperspirant buildup: a paste of baking soda and water, or a diluted white vinegar soak, loosens the aluminum salts that trap odor.
What to Keep on Hand
- Mild liquid detergent (free of bleach and optical brighteners)
- Oxygen-based stain remover powder
- Enzymatic cleaner for protein stains
- Clear dish soap for grease
- Isopropyl alcohol for ink, used sparingly and away from prints
- A soft-bristled brush or clean white cloth for gentle agitation
Apply the cleaner to the stain, not the print. Let it dwell 10 to 15 minutes, then wash as normal. If the stain persists, repeat the same gentle method rather than escalating to a harsher chemical, because the print, not the fabric, is what fails first.
DIY Solutions: Baking Soda Paste, Vinegar, and Hydrogen Peroxide
A baking soda paste lifts many stains without harsh chemicals. Mix two parts baking soda with one part water, then spread the paste on the stain.
Smoking nationSwagHeavyweight Unisex →
How to Remove Oil Stains From Cotton Graphic Tees
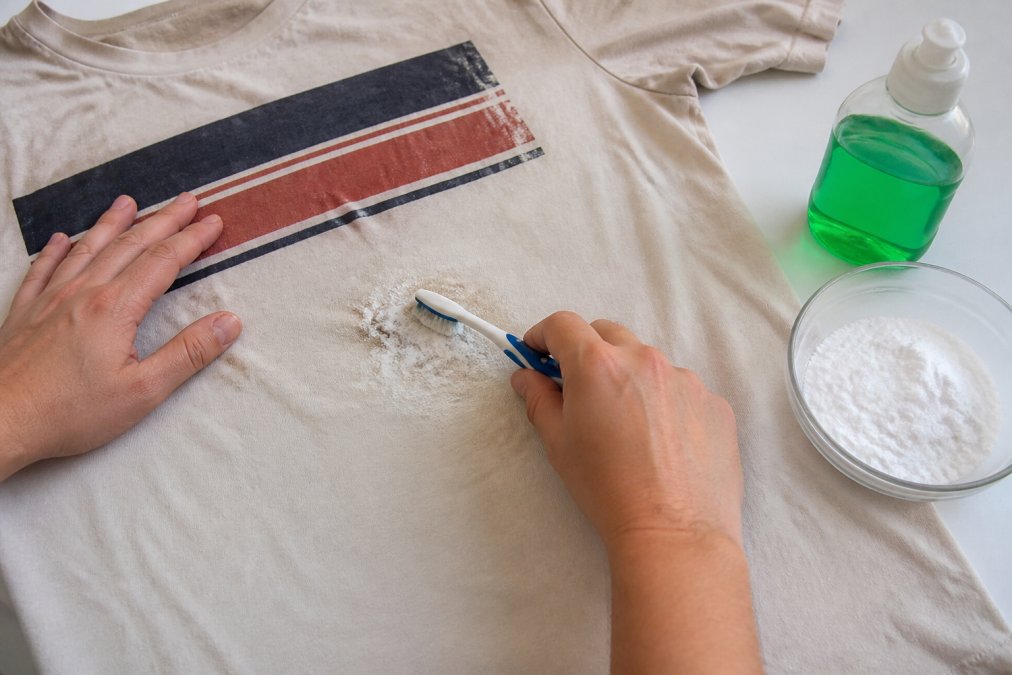
Oil stains need a different approach than water-based stains. Grease bonds to cotton fibers, so you have to break it down before washing.
Emergency vs. Deep-Set Stains: Two Different Protocols
A fresh spill and an old stain need two different plans. A fresh stain sits on the surface of the fiber and print; a deep-set stain has oxidized, bonded to the cotton, and often been heat-set by a dryer cycle. Matching your method to the timing is the difference between a clean shirt and a ruined one.
Emergency Protocol: The First 10 Minutes
Speed does most of the work here. The goal is to lift the stain before it bonds.
- Blot, do not rub. Press a clean white cloth or paper towel from the outside of the stain toward the center. Rubbing pushes the stain into the fibers and spreads it across the print.
- Flush from the back. Hold the stained area under cool running water from the underside of the fabric. This pushes the stain out the way it came in instead of driving it deeper.
- Apply a small amount of mild detergent or enzymatic cleaner directly to the stain. Keep it off the print where possible.
- Let it dwell 10 to 15 minutes. Do not let it dry out; re-wet if needed.
- Wash immediately in cold water on a gentle cycle.
- Check before drying. If any trace remains, repeat. Heat sets what is left.
Deep-Set Protocol: When the Stain Has Been Through the Dryer
Once a stain is heat-set, surface cleaning will not touch it. You need to rehydrate and break the bond.
- Soak in cool water with an enzymatic or oxygen-based cleaner for 30 minutes to several hours. Oxygen cleaners need time and cool water to release their active oxygen; hot water deactivates the percarbonate before it works.
- Work the cleaner into the stain with a soft brush, using light circular motion. Do not scrub the print.
- Apply a stain remover and let it sit 15 to 30 minutes.
- Wash in cold water. Repeat the soak-and-wash cycle up to three times before trying anything stronger.
- Air dry between attempts. Never put a stained shirt in the dryer, because each dryer cycle makes the next attempt harder.
Quick Reference
| Situation | First Move | Dwell Time | Wash Temp | Print-Safe Notes |
|---|---|---|---|---|
| Fresh spill | Blot, flush from back, detergent | 10-15 min | Cold | Keep cleaner off print |
| Fresh grease | Absorb with powder, dish soap | 15 min | Warm (label max) | No water flush first |
| Deep-set stain | Soak in oxygen/enzymatic cleaner | 30 min-4 hrs | Cold | No scrubbing |
| Vintage shirt | Cool soak, no brush | 15-30 min | Cold | Air dry only |
| Unknown stain | Spot test, mild detergent | 5 min | Cold | Test hidden hem first |
The Rule That Ties Both Protocols Together
Never put a stained shirt in the dryer until you are certain the stain is gone. Heat does not remove stains; it fixes them permanently into the fiber. Air drying costs you a day and saves the shirt.
Drying and Heat Exposure: What Ruins Prints After the Stain Is Gone
Heat is what ruins a graphic tee after the stain is already gone. The dryer is where most prints crack and fade, not the wash.
A few habits that protect the print:
- Tumble dry low, or air dry flat
- Remove the shirt while it is still slightly damp
- Never iron directly on the graphic
Conclusion
Stains on graphic tees are not a lost cause, but they need the right method. Match your approach to the stain, keep heat off the print, and act fast when you can.
Frequently Asked Questions
Can you use bleach on graphic t-shirts?
No. Chlorine bleach breaks down the inks used in screen printing, direct-to-film, and heat transfer designs, causing the graphic to fade, crack, or turn yellow. Even oxygen-based color-safe bleach should be spot tested first because it can strip dye from the fabric around the print. For white graphic tees with stubborn stains, use a pH-neutral enzymatic cleaner or a baking soda paste instead, and always check the fabric care label before applying anything.
How do you remove a stain from a shirt without damaging the screen print?
Work from the back of the fabric whenever possible. Place the stained area face-down on a clean towel, apply a mild detergent or enzymatic cleaner to the back of the stain, and blot with a white cloth. Avoid scrubbing directly over the graphic. Rinse with cold water, then air dry. If the stain persists, repeat the pre-treat step rather than increasing agitation, which is what causes fiber damage and print cracking.
Does hot water ruin graphic designs on shirts?
Hot water accelerates ink breakdown and causes shrinkage in cotton blends, which stresses the print and leads to cracking. Cold water is safer for both stain removal and print longevity. Use cold water for the wash and rinse cycles, and never pour hot water directly onto a stained graphic. If you must use warm water for oil-based stains, keep it below 90°F and only on the stained area, not the entire garment.
How do you get oil stains out of cotton graphic tees?
Apply a small amount of grease-cutting dish soap or a citrus-based cleaner directly to the oil stain, let it sit for 10 to 15 minutes, then work it in gently with your fingers or a soft brush. Rinse with cold water. For deep-set oil stains, make a baking soda paste with a few drops of water, apply it over the stain, and let it dry before brushing it off and washing. Always spot test on an inside hem first.